
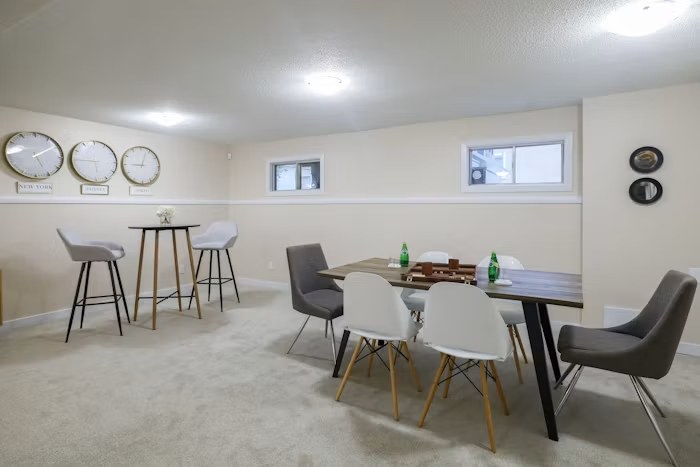
An inexpensive basement makeover is less about finding the cheapest version of every material and more about putting the budget where it will have the greatest effect. A clear layout, better lighting, fresh finishes, and organized storage can change how the basement feels without turning the project into a full luxury renovation.
The first decision is whether the space needs a cosmetic refresh or construction work. Paint and décor cannot solve water entry, unsafe wiring, damaged materials, or inadequate insulation. Address those conditions before spending on visible upgrades.
Set One Clear Goal for the Makeover
Choose the basement’s primary use before buying materials. A family lounge, home office, playroom, exercise area, and guest space each have different needs. Trying to build all of them at once often spreads the budget too thin and creates a cluttered room.
Write down the essential function, the condition of the existing room, and the features that can stay. Preserve serviceable flooring, doors, lighting locations, and storage wherever they support the new plan. Money saved by retaining good components can be directed to areas with greater visual or practical impact.
Separate Must-Fix Work from Nice-to-Have Work
Inspect the basement before planning cosmetic changes. Look for:
- Active or previous water entry
- Musty odours or damaged finishes
- Cracks that need assessment
- Cold walls or floors
- Inadequate lighting or too few outlets
- Exposed or unsafe electrical work
- Mechanical equipment that lacks access
- Low headroom around bulkheads or stairs
Create two lists: work required for a dry, safe, usable room and upgrades that improve its appearance. This prevents decorative purchases from taking priority over the conditions that determine whether the makeover will last.
Keep the Existing Layout When It Works
Moving walls, plumbing, ducts, or electrical systems can expand the renovation scope quickly. If the current layout already supports the intended use, keep it and improve how the room is zoned.
Furniture placement, area rugs, lighting, and paint can define a lounge, desk, or play area without new partitions. Open shelving can act as a light divider while preserving sightlines. A curtain or movable screen can create occasional privacy without permanently dividing the basement.
Refresh the Walls Strategically
Paint usually creates the largest visual change with the least disruption. Repair visible damage, prepare the surface properly, and use a consistent palette so the room feels connected.
Light, warm neutrals can brighten a basement, while one accent colour can establish a focal area. If an entire feature wall is outside the scope, use a painted arch, framed panel, or small wallpaper section behind a desk or media console.
Avoid covering stains or moisture-damaged drywall without identifying the source. A fresh finish over an unresolved problem is likely to fail.
Choose Basement-Appropriate Flooring
The least expensive flooring is not a bargain if moisture or slab conditions cause it to deteriorate. Before installing anything, confirm that the floor is dry, reasonably level, and appropriate for the proposed material.
Budget-conscious options may include:
- Retaining a sound existing floor and adding area rugs
- Painting or coating a prepared concrete slab
- Installing basement-suitable resilient flooring
- Replacing only damaged transitions or sections where a compatible repair is possible
Consider warmth, moisture resistance, cleaning, and comfort underfoot. A playroom or home office may need a different surface than a laundry or storage area.
Improve Lighting Before Buying More Décor
Poor lighting makes inexpensive finishes look unfinished. Start by replacing mismatched bulbs, cleaning lenses, and checking whether existing fixtures distribute light evenly.
Layered lighting can be created gradually. Use the ceiling fixtures for general light, add a floor or table lamp at seating, and place task lighting at a desk, craft table, or game surface. Keep colour temperature consistent so the room does not look patchy.
Where new electrical work is needed, plan it around the final furniture layout. This avoids paying for outlets or fixtures that end up behind cabinets or far from the work zone.
Use One Feature Instead of Many
A focused improvement looks more intentional than several unrelated upgrades. Choose one element to carry the room:
- A painted media wall
- A compact built-in bench
- A wall of organized shelving
- A gallery of framed prints
- A defined reading or gaming corner
- A simple slatted or panelled accent
Repeat one colour or material elsewhere in the basement to connect the feature to the room. Restraint is especially useful in smaller or lower-ceilinged basements.
Make Storage Part of the Design
An unfinished or partially finished basement often holds items from the rest of the house. If storage is ignored, the renovated area will quickly become crowded.
Use clearly labelled bins on sturdy shelving for long-term storage and closed cabinets for everyday clutter. Benches, ottomans, and media units can serve more than one purpose. Keep access clear around panels, shutoffs, cleanouts, sump equipment, and mechanical systems.
Before buying new cabinetry, sort what is already stored downstairs. Reducing the volume may eliminate the need for a large custom solution.
Save with Reuse and Selective DIY
Existing furniture can often be repainted, reupholstered, or rearranged to suit the basement. Reuse matching trim where it is in good condition, update hardware instead of replacing complete cabinets, and frame affordable prints in a consistent style.
DIY work is best limited to tasks you can complete safely and cleanly. Painting, simple décor, furniture assembly, and organization may be appropriate for many homeowners. Electrical, plumbing, structural work, moisture remediation, and permit-related work should be handled by qualified professionals.
Poorly executed DIY can increase the eventual repair scope, so include tools, preparation, disposal, and finishing time in the decision.
Phase the Makeover in the Right Order
A phased plan allows the basement to improve without redoing completed work. A practical order is:
- Resolve water, safety, and structural concerns.
- Confirm the layout and access requirements.
- Complete necessary electrical, plumbing, or HVAC work.
- Repair walls, ceilings, and floors.
- Paint and install fixed finishes.
- Add lighting, furniture, storage, and décor.
If a later phase may include a bathroom, kitchenette, or new room, plan pathways and service locations early. Small preparatory decisions can prevent opening finished surfaces again.
Know When a Makeover Becomes a Renovation
A cosmetic makeover can refresh a dry, functional basement. It becomes a larger renovation when the project needs new rooms, significant electrical or plumbing work, insulation, moisture correction, structural changes, or permit coordination.
For current GTA budgeting information, use GMC’s basement renovation cost guide rather than relying on a generic makeover estimate. The right scope depends on the basement’s existing condition and the intended use.
Create a Basement That Feels Intentional
An inexpensive makeover succeeds when every change supports the room’s main purpose. Keep the workable elements, correct underlying problems, improve lighting, simplify the palette, and add storage before decorative extras.
GMC Construction renovates basements across Toronto, Richmond Hill, North York, Thornhill, Markham, and Vaughan. For help separating a practical makeover from a larger renovation scope, call 647-450-4466.
Ready to turn this into a real project?
Take what you just read and connect it to our basement renovation service — we’ll scope project type, location, timing and budget so you get an accurate quote.
Get a free estimate for your project
Tell us what you're planning and our team will get back to you within 24–48 hours. No obligation.