
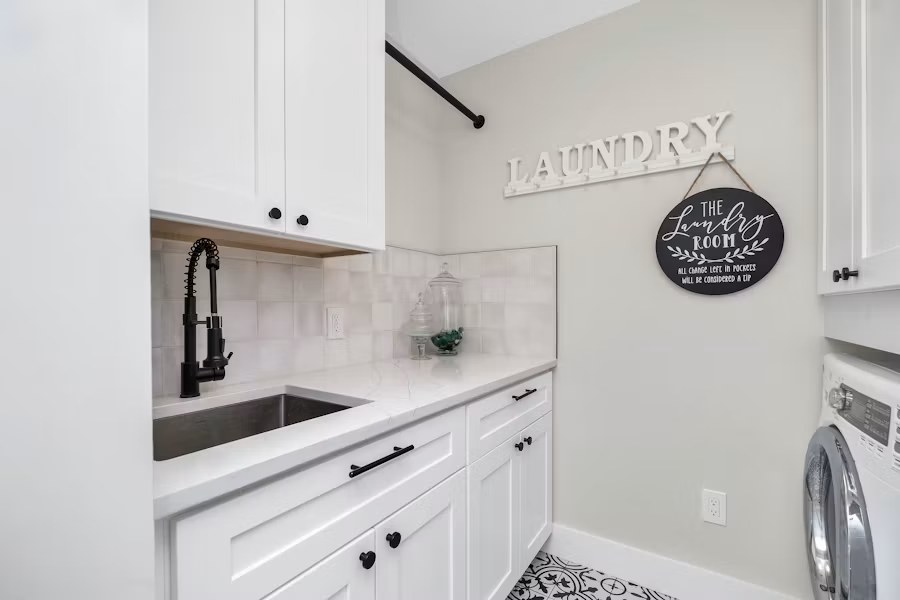
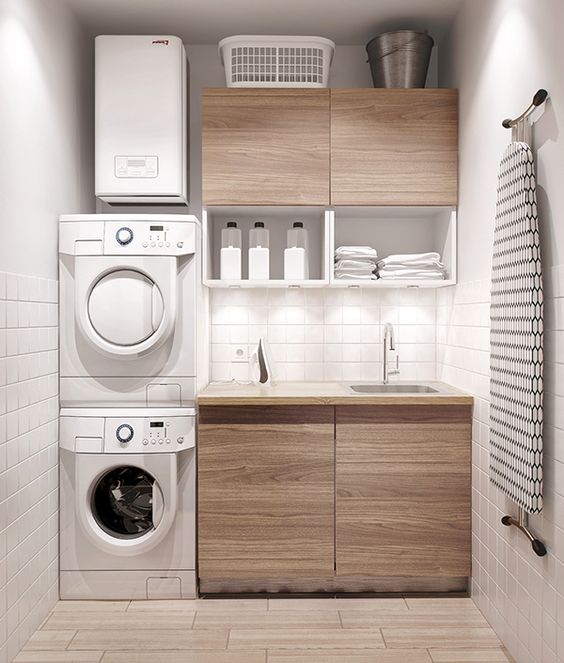
IKEA systems can make a laundry room easier to plan because cabinets, wall storage, bins, rails, and accessories can be combined around a repeatable grid. The best result is not a room filled with products; it is a workflow that supports sorting, washing, drying, folding, ironing, and storing without wasted movement. Start with the appliances and utilities, then build storage around their service clearances. IKEA Canada currently features BOAXEL and ENHET among its laundry storage systems, but availability, dimensions, finishes, and compatible components can change. Verify every item before the renovation drawings are finalized.
Plan the Laundry Workflow First
Map the room in the order chores happen:
- a landing zone for baskets and pockets;
- separate storage for darks, lights, delicates, and household linens;
- washer and dryer access;
- hanging or drying space;
- a folding surface;
- storage for clean laundry; and
- a safe place for detergent, stain products, and cleaning supplies.
Measure the appliance bodies, doors, hoses, vents, plugs, shutoffs, and required side and rear clearances. A cabinet plan that fits on paper can still block a dryer door, kink a hose, or make a shutoff inaccessible.
Choose the Right IKEA System for Each Zone
ENHET for Cabinet-Based Storage
ENHET combinations can work well above or beside appliances when you want a mix of closed cabinets and open shelves. Closed storage hides detergent and cleaning products; open sections keep daily items within reach. Confirm wall construction and mounting requirements before installation. Heavy wall cabinets cannot rely on drywall alone, and the mounting strategy must account for plumbing, electrical, and dryer-vent routes.
BOAXEL for Adjustable Wall Storage
BOAXEL is useful where shelf heights and hanging zones may change. It can support baskets, shelves, and drying functions without consuming much floor space. An adjustable system is especially helpful in a narrow room, utility area, or unfinished section of a basement. Keep wet clothing loads within the system’s published limits and use the specified fasteners for the wall type. Do not mount a storage rail where it could puncture concealed wiring, pipes, or ducts.
SEKTION for a Built-In Cabinet Look
SEKTION kitchen cabinets can create a more integrated laundry-room appearance, especially when a sink, countertop, or tall pantry is part of the plan. Their kitchen origins are useful for creating continuous cabinet runs, but the room still needs laundry-specific detailing for appliance ventilation, moisture, leak access, and utility servicing. Do not place cabinets or decorative panels so tightly around a washer or dryer that the appliance manufacturer’s clearance requirements are lost.
JONAXEL and Freestanding Storage for Utility Zones
Open metal storage can suit a mechanical room, mudroom-laundry combination, or budget-conscious setup. Freestanding units are easier to reconfigure and can keep baskets ventilated. Secure tall units where required and avoid obstructing the electrical panel, floor drain, furnace, water heater, or shutoff valves.
Consolidate the Budget in One Place
Product prices and availability change, so build one current cart after the room is measured. Use this table to prevent a low product subtotal from hiding the rest of the renovation scope.
| Budget component | What to include | Price status |
|---|---|---|
| IKEA storage system | Frames, cabinets, shelves, rails, baskets, doors, hinges, and hardware | Current IKEA Canada cart total |
| Countertop and supports | Counter material, finished edges, appliance-spanning support, and wall cleats | Supplier quotation |
| Sink and faucet | Sink, faucet, drain, shutoffs, trap, and installation fittings | Selected-product total |
| Plumbing and electrical | Relocations, dedicated circuits, receptacles, lighting, valves, drain work, and inspections | Trade quotation |
| Dryer ventilation | Duct route, exterior termination, access, and commissioning | Trade quotation |
| Installation and finishing | Assembly, fastening, fillers, panels, paint, trim, caulking, and disposal | Contractor quotation |
This is the only budget table the project needs. Update it when selections change so cabinets, trades, and finishing remain in the same total.
Create a Safe Counter Over Front-Load Appliances
A counter above side-by-side front-load machines creates a practical folding station, but it should be independently supported. Do not let the countertop bear on the appliance tops. Leave the required gap for vibration, airflow, levelling, and removal. For a deep counter, consider a backsplash or raised edge to stop small items from falling behind the machines. Keep shutoffs and plugs reachable through an adjacent cabinet, removable panel, or other service opening.
Build a Tall Utility Cabinet
A tall cabinet can store an ironing board, mop, vacuum, broom, and bulk supplies in one footprint. Divide it vertically so long tools do not compete with shelves. Add shallow door storage only if it does not overload the hinges or interfere with the cabinet interior. Household chemicals should be separated from linens and secured where children or pets could reach them. Ventilation may be appropriate for damp mops or cleaning cloths.
Use Pull-Out Sorting Instead of Floor Piles
Plan two or more removable hampers near the washer. Pull-out baskets keep sorting off the floor and make it easier to carry loads. If damp towels may sit before washing, use ventilated containers and avoid sealing moisture inside a cabinet. Labelled bins can organize stain products, mesh bags, dryer accessories, spare hangers, and cleaning cloths. Store daily supplies between waist and shoulder height; reserve high shelves for lighter, infrequently used items.
Add Open Shelves Without Creating Visual Clutter
Open shelves work best for matching containers, folded towels, and frequently used supplies. Limit their depth above a sink or counter so they do not become a head hazard. Keep detergent in its original labelled container or a safely identified alternative; appearance should not create a poisoning risk. Mix open and closed storage. A small open zone keeps the room airy, while cabinet doors hide bulk packages and irregular items.
Design a Drying Zone
A wall-mounted rail, retractable line, ceiling rack, or BOAXEL hanging section can reduce dryer use and protect delicate clothing. Position the drying zone where drips will not damage cabinetry or flooring. Air movement matters: wet clothing packed into a closed room dries slowly and can increase humidity. In a basement laundry, coordinate drying storage with the room’s ventilation and dehumidification plan. In a main-floor closet laundry, confirm that doors or partitions do not trap heat from the appliances.
Add a Sink Only When the Plumbing Plan Works
A laundry sink is useful for soaking, handwashing, cleaning tools, and emptying a dehumidifier. Its value depends on location. Keeping it near existing water and drainage can simplify construction, while moving it may require wall, floor, or ceiling access. Choose a basin deep enough for the intended tasks and a cabinet material suitable for occasional splashes. Include leak protection, accessible shutoffs, and a durable counter-to-sink joint.
Improve Lighting at the Work Surface
Laundry rooms need clear task lighting, not only a decorative ceiling fixture. Use bright general lighting and add under-cabinet or wall lighting over the sink, folding counter, and stain-treatment area. Avoid placing shelves where they cast shadows on the worktop. All electrical work must respect appliance loads, damp-location conditions, and the Electrical Safety Authority process. Lighting and receptacle locations should be coordinated before cabinets are ordered.
Make a Small Laundry Room Feel Larger
For a closet or narrow room:
- use shallow wall storage where full-depth cabinets would pinch the aisle;
- stack appliances only when the manufacturer permits it and the correct kit is used;
- choose sliding, pocket, or outward-swinging doors only where the building layout and code allow;
- use one continuous light-coloured counter or backsplash to reduce visual breaks;
- put the hamper on wheels or inside a pull-out; and
- use the back of a suitable door for light accessories, not heavy storage.
Do not sacrifice service access to gain a few centimetres of storage. Appliances eventually need repair or replacement.
Coordinate IKEA Components With Built-In Construction
IKEA components can provide the visible storage, while a contractor handles blocking, fillers, appliance supports, countertops, plumbing, electrical work, ventilation, and finish carpentry. Confirm the final product list before rough-ins because cabinet widths and service locations must agree. The installation package should show:
- finished wall-to-wall dimensions;
- appliance model numbers and clearances;
- cabinet and rail mounting heights;
- blocking locations;
- counter supports and seams;
- sink, drain, vent, and shutoff locations;
- dryer duct path;
- receptacle and lighting locations; and
- removable access points.
Conclusion
The best IKEA laundry room is organized around the work, not around a catalogue image. Use ENHET or SEKTION where closed cabinetry and counters make sense, BOAXEL for adjustable wall storage, and freestanding components where flexibility matters. Measure the appliances and utilities first, keep service access intact, and combine every product and installation cost in one live budget before ordering.