
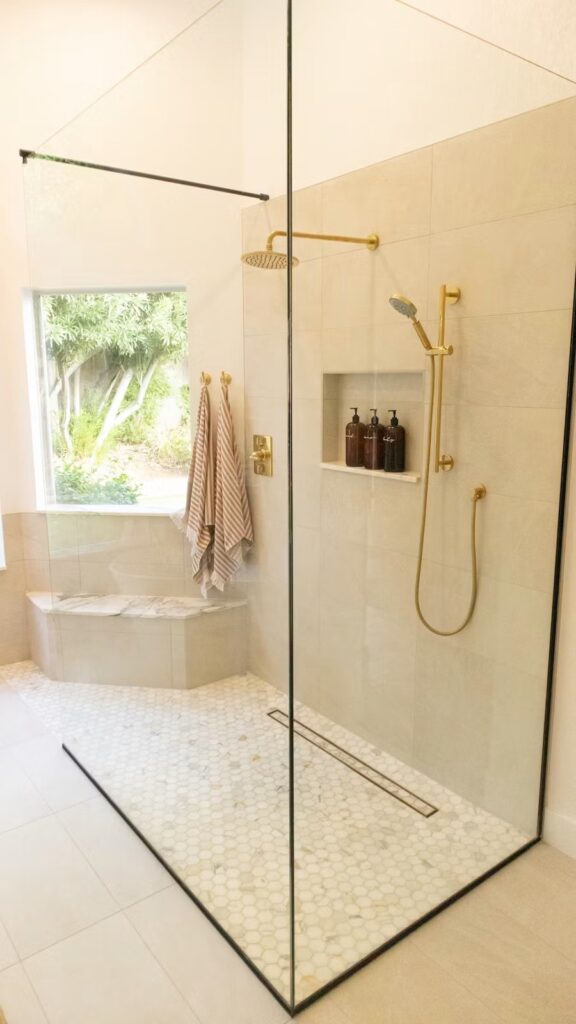
A curbless shower removes the raised threshold between the shower and the bathroom floor. The continuous transition can make the room feel more open and may support easier entry, but the clean appearance depends on careful coordination of drainage, waterproofing, floor elevations, glass, and tile.
This article focuses on design ideas for a no-threshold shower. For a decision-focused review of advantages and drawbacks, see the separate curbless shower pros-and-cons guide.
Start with the Floor Plane and Drainage
The floor is the foundation of the curbless design. The shower area needs a consistent slope toward the drain while the surrounding bathroom remains comfortable and practical to walk on.
A linear drain can support a single-direction slope and work well with large-format tile. A point drain creates slopes from several directions and may suit smaller-format tile or mosaic sheets. The best option depends on the room structure, joist direction, drain location, tile choice, and waterproofing assembly.
Use Frameless Glass to Preserve Sightlines
Frameless glass keeps the shower visually connected to the rest of the bathroom. Clear glass allows tile and lighting to continue through the space, which can make a compact room feel less divided.
The enclosure can be designed as:
- a fixed splash panel
- a fixed panel with an open entry
- a hinged glass door; or
- a combination of fixed and operable panels.
Glass size and placement should control overspray without making the entry awkward. The final design must also account for hinges, supports, nearby fixtures, and cleaning access.
Continue Tile Across the Bathroom Floor
Using one floor material can strengthen the seamless effect. The tile still needs to work with the required slope and provide suitable traction in wet conditions.
Large-format tile creates fewer grout joints but can be more difficult to shape around a multi-directional slope. Smaller tile or mosaics follow complex slopes more easily and create additional grout lines that may improve grip. A linear-drain layout may offer more flexibility for larger tile.
Add Natural Stone Carefully
Marble, granite, travertine, and other natural stones can create a warm, spa-like shower. Select the finish for traction and confirm the stone’s absorption, sealing, cleaning, and maintenance requirements.
Natural stone should be treated as part of a complete wet-area assembly. Stone selection does not replace proper waterproofing or compatible setting materials.
Build in a Bench and Storage Niche
A bench can support comfort, accessibility, or daily routines. It may be full-width, corner-mounted, floating, or fold-down depending on the space.
Recessed niches keep bottles off the floor and reduce the need for projecting shelves. Plan niche dimensions around the products being stored, tile layout, framing, and waterproofing. Avoid placing a niche where it receives unnecessary direct spray if another wall is available.
Integrate Lighting into the Shower Zone
Good lighting makes a curbless shower safer and more inviting. Recessed wet-location fixtures can provide general illumination, while concealed lighting in an approved niche or ceiling detail can add ambience.
Use separate controls or dimming when the bathroom needs both bright task light and softer evening light. Fixture selection and installation must suit the wet location.
Pair the Shower with Floating Storage
A floating vanity or wall-mounted storage keeps more floor visible and reinforces the open design. It can also make cleaning easier around the base of the cabinetry.
Choose moisture-resistant materials and plan enough closed storage to prevent the room from looking cluttered. Open shelving can be used for towels or decorative items, but daily toiletries are usually easier to manage behind doors or in drawers.
Create Contrast Without Breaking the Flow
A seamless shower does not have to be visually plain. Contrast can come from:
- a darker feature wall inside the shower
- a different tile texture in the wet zone
- coordinated black, brass, or chrome fixtures
- a stone bench or niche surround; or
- a vanity colour that repeats a tone in the tile.
Keep the number of finishes controlled so the shower remains part of one coherent bathroom design.
Support Barrier-Free Use
The no-threshold entry can be combined with other universal-design features, including a wider approach, well-positioned controls, a hand shower, a bench, reinforcement for grab bars, and slip-conscious flooring.
Accessibility should be planned around the specific user. A curbless entry alone does not make the entire bathroom accessible; turning space, fixture clearances, reach ranges, and safe support also matter.
Coordinate the Invisible Work Early
Curbless shower design affects framing, floor height, drain placement, waterproofing, tile layout, and glass dimensions. Resolve these elements before demolition whenever possible. Late changes can compromise the clean transitions that make the design successful.
To plan a curbless shower as part of a bathroom renovation, call GMC Construction at 647-450-4466.
Ready to turn this into a real project?
Take what you just read and connect it to our bathroom renovation service — we’ll scope project type, location, timing and budget so you get an accurate quote.
Get a free estimate for your project
Tell us what you're planning and our team will get back to you within 24–48 hours. No obligation.