
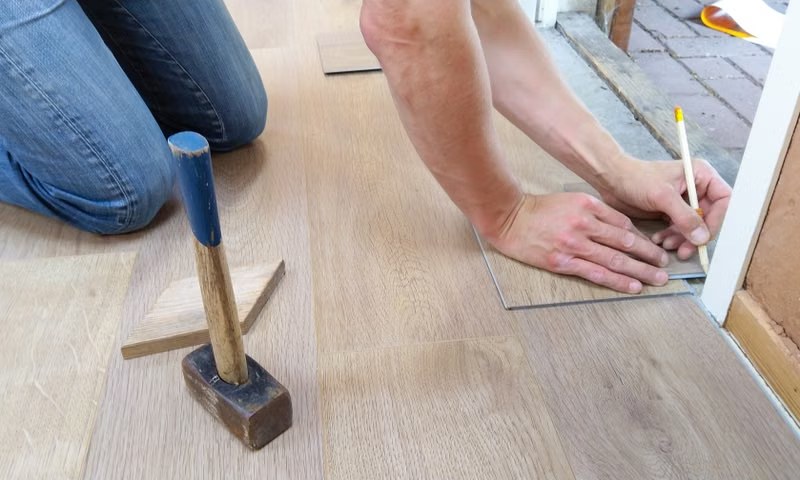
Hardwood flooring can add warmth, durability, and lasting visual appeal to a home. A successful installation depends on more than fastening boards in place: the material must suit the room, the subfloor must be ready, and the layout must allow the wood to move naturally with changes in indoor conditions.
This guide outlines the main steps for a DIY installation. Always follow the flooring manufacturer’s instructions because acclimation, fastening, adhesive, underlayment, and expansion requirements vary by product and installation method.
Why Homeowners Choose Hardwood Flooring
- Timeless appearance: Natural wood works with a wide range of interior styles.
- Durability: A suitable product can provide long service when installed and maintained correctly.
- Straightforward cleaning: Smooth floors do not hold dust in the same way as carpet.
- Long-term appeal: Hardwood is a finish many homeowners value when renovating or buying a home.
Confirm the Flooring and Installation Method
Before buying tools, confirm whether the product is solid hardwood, engineered hardwood, or another wood-based flooring system. The manufacturer will specify where the product can be installed and which method is permitted.
Common installation methods include:
- nail-down or staple-down over a suitable wood subfloor
- glue-down with an approved adhesive; and
- floating or click-lock installation for compatible products.
Do not select the method based only on convenience. The flooring, subfloor, room level, and moisture conditions all matter.
Tools and Materials
| Tool or Material | Purpose |
|---|---|
| Tape measure | Measures the room and board cuts |
| Chalk line | Establishes a straight reference line |
| Level or straightedge | Checks the subfloor for high and low areas |
| Moisture meter | Helps assess flooring and subfloor conditions |
| Miter or flooring saw | Cuts boards to length |
| Flooring nailer or stapler | Fastens boards where the system requires it |
| Rubber mallet and tapping block | Fits boards without damaging finished edges |
| Pull bar | Closes joints near walls and in the last rows |
| Spacers | Maintains the specified perimeter gap |
| Utility knife | Cuts underlayment and related materials |
| Eye, hearing, and respiratory protection | Supports safer cutting and preparation |
Step-by-Step Hardwood Flooring Installation
1. Inspect and prepare the subfloor
Remove old flooring, loose fasteners, dust, adhesive residue, and debris. The subfloor should be clean, dry, sound, and flat within the flooring manufacturer’s tolerance.
Secure loose wood subfloor areas and correct squeaks where practical. Concrete and wood substrates require different moisture checks and preparation. Install a vapour retarder, underlayment, or moisture-control system only when it is compatible with the product and assembly.
2. Acclimate the flooring as directed
Store the flooring in the installation area under the indoor conditions specified by the manufacturer. Do not assume that every wood product needs the same acclimation period. Use moisture readings and product instructions to determine when the material is ready.
3. Plan the layout
Measure the room and establish a straight starting line. Consider the longest sightline, connected rooms, doorways, stairs, and focal points. Dry-lay several rows to check board width at the opposite wall and avoid an impractically narrow final row.
Mix boards from several cartons as you work so colour and grain variation are distributed naturally.
4. Install the first row
Place spacers at the wall to maintain the expansion gap required by the manufacturer. Keep the first row straight because every later row follows it. Face-fastening may be required near the wall where a flooring nailer cannot reach; follow the product instructions.
5. Continue the field rows
Stagger end joints according to the manufacturer’s minimum spacing. Avoid creating a repeated stair-step pattern or aligning joints in adjacent rows. Use a tapping block or approved tool to close joints without striking the finished edge directly.
For nail-down, staple-down, glue-down, or floating systems, follow the specified fastener spacing, adhesive working time, and joint procedure. Check alignment regularly instead of waiting until the far wall to correct drift.
6. Cut around doorways and obstacles
Measure carefully around door jambs, vents, columns, and irregular walls. Undercutting compatible door casings can create a cleaner transition than shaping the board around the trim. Maintain required movement space at all fixed vertical surfaces.
7. Fit the final row
Measure the remaining width at several points because walls are not always straight. Rip the final boards to fit while preserving the required perimeter gap. A pull bar can help close the last joints where a tapping block will not fit.
8. Install trim and transitions
Remove spacers and install baseboards or quarter-round to cover the perimeter gap. Fasten trim to the wall, not through the flooring, so the floor can move. Use suitable transition profiles at doorways and where the hardwood meets another flooring material.
Common DIY Mistakes
| Mistake | Why It Causes Problems |
|---|---|
| Skipping moisture checks | Wood may gap, cup, or move after installation |
| Installing over an uneven subfloor | Boards can flex, squeak, or separate |
| Starting without a straight reference | Rows can drift across the room |
| Ignoring expansion requirements | Flooring may bind or buckle |
| Repeating end joints | The layout looks artificial and may be less stable |
| Using the wrong fastener or adhesive | The installation may not meet product requirements |
| Fastening trim through the floor | Natural movement can be restricted |
When to Call a Flooring Professional
Professional help is worth considering when the project includes large connected areas, stairs, complex transitions, significant subfloor correction, moisture concerns, radiant heating, or an intricate layout. A professional can also confirm whether the selected product and installation method are appropriate for the room.
For hardwood flooring installation as part of a renovation in Toronto, Richmond Hill, North York, Thornhill, Markham, or Vaughan, call GMC Construction at 647-450-4466.
Ready to turn this into a real project?
Take what you just read and connect it to our home renovation service — we’ll scope project type, location, timing and budget so you get an accurate quote.
Get a free estimate for your project
Tell us what you're planning and our team will get back to you within 24–48 hours. No obligation.