
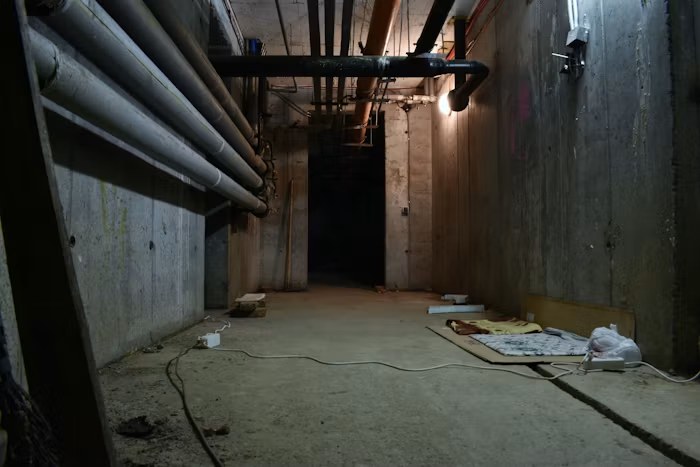
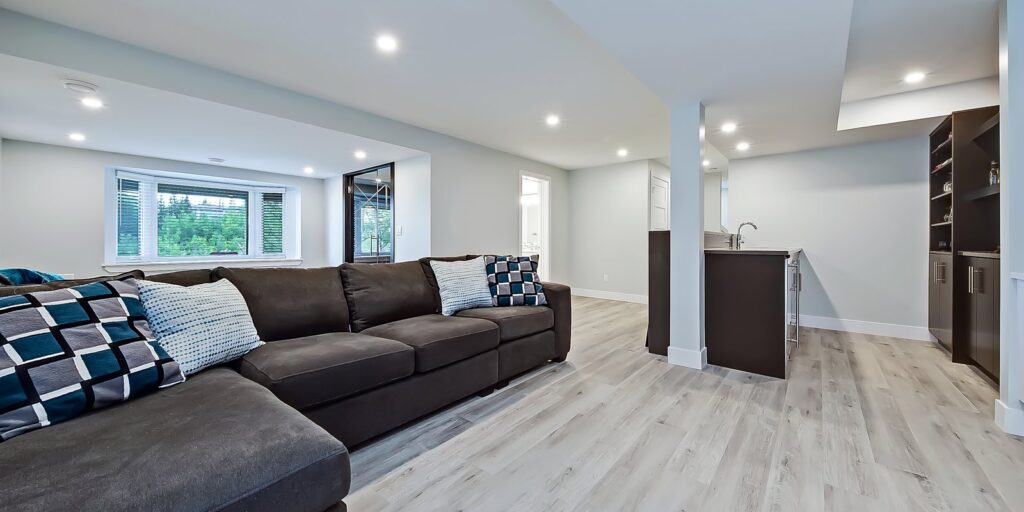
A basement renovation succeeds when the decisions are made in the right order. Finishes come late. Moisture, structure, intended use, permits, mechanical systems, and inspection access come first. Use this checklist from the first site review through final closeout. Not every item applies to every basement, but unanswered items should be resolved before work moves to the next phase.
Define the Purpose and Priorities
- Decide whether the basement will be a family room, office, gym, guest space, playroom, home theatre, additional dwelling unit, or a combination.
- List the people who will use it and how often.
- Separate must-have rooms from optional features.
- Decide whether a bedroom, bathroom, kitchenette, laundry room, or separate entrance is required.
- Identify storage needs before drawing walls.
- Confirm whether the space needs privacy from the main floor.
- Record future needs such as aging in place, children, guests, or rental use.
The intended use controls egress, fire separation, plumbing, ventilation, acoustics, lighting, and permitting. Avoid designing a “flex room” without stating what it may become.
Gather Property Information
- Collect surveys, prior permits, drawings, inspection reports, and renovation records.
- Check for open permits or unresolved orders.
- Photograph the unfinished ceiling, walls, slab, services, and foundation before construction.
- Measure ceiling height at beams, ducts, and low points—not only between joists.
- Locate the electrical panel, furnace, water heater, main shutoff, drains, cleanouts, sump, and backwater valve.
- Mark windows, stairs, posts, beams, and service access zones.
- Confirm whether asbestos, lead, mould, or other hazardous-material testing is appropriate before demolition.
Inspect Water and Moisture Conditions
- Look for active leaks, efflorescence, staining, odour, mould, corrosion, and damaged finishes.
- Inspect foundation cracks and previous repairs.
- Review exterior grading, downspouts, window wells, drains, and sump discharge.
- Check plumbing for leaks and condensation.
- Determine whether the slab or foundation transmits moisture.
- Repair water entry before insulation or finishes are installed.
- Document a plan for future access to sump, backwater, valves, and drains.
Do not treat paint, flooring, or interior wall panels as waterproofing. The source of water needs to be understood and corrected.
Review Structure and Ceiling Constraints
- Identify bearing walls, beams, posts, joist direction, and concentrated loads.
- Assess cracks, sagging, cut joists, notched beams, or altered posts.
- Confirm whether walls, stairs, windows, walkouts, or ceiling heights will change.
- Coordinate structural work with plumbing, ducts, lighting, and headroom.
- Plan temporary support for any approved structural alteration.
- Keep required structural work visible for inspection.
Never remove a post or modify a joist simply to improve the layout. The full load path must remain supported.
Confirm Zoning, Permits, and Other Approvals
- Confirm the authority having jurisdiction for the property.
- Check zoning when adding a dwelling unit, entrance, window, parking change, or change of use.
- Identify building, plumbing, drain, HVAC, and structural permits.
- Identify the separate Electrical Safety Authority notification.
- Review condo, townhouse, heritage, conservation, or shared-property approvals where applicable.
- Prepare coordinated existing and proposed drawings.
- Assign application and inspection responsibilities in writing.
- Wait for required approvals before regulated construction begins.
Toronto’s building-permit guidance lists common basement scopes that require approval, including structural alterations, modified plumbing or heating, underpinning, a new entrance, and an additional dwelling unit. Other GTA municipalities have their own portals and local requirements.
Set a Complete Project Budget
- Price the same drawings and scope with each contractor.
- Include design, surveys, permits, inspections, and reports.
- Include demolition, protection, disposal, and cleanup.
- Include plumbing, electrical, HVAC, framing, insulation, drywall, ceiling, flooring, paint, and trim.
- Define fixture and finish allowances clearly.
- Include equipment or service upgrades identified during design.
- Carry a contingency based on the basement’s age, condition, and investigation level.
- Decide how changes will be priced and approved.
- Align payments with defined progress milestones.
For whole-project benchmarks, cross-link to the basement renovation cost guide instead of turning the checklist into another cost article.
Plan the Layout
- Keep a clear path from the stairs to primary rooms and exits.
- Place rooms around ceiling height, windows, posts, ducts, and drainage—not against them.
- Confirm furniture dimensions and circulation before fixing wall locations.
- Reserve adequate space around mechanical and electrical equipment.
- Provide service access to valves, cleanouts, dampers, junctions, and pumps.
- Use awkward zones for storage rather than forcing occupied rooms into them.
- Coordinate door swings and pocket-door cavities with services.
- Plan egress for any bedroom or dwelling unit under the applicable approved design.
Coordinate Plumbing and Bathrooms
- Verify the building-drain location and elevation.
- Confirm gravity drainage or specify a complete pumping solution.
- Lay out water supply, drainage, venting, cleanouts, and shutoffs.
- Coordinate slab cutting with foundations and other services.
- Select fixtures before rough-in.
- Specify shower or tub waterproofing as a complete system.
- Route bathroom exhaust to the exterior.
- Keep rough plumbing visible until inspection.
Plan Electrical, Lighting, and Data
- Map furniture, television, desk, appliance, and equipment locations.
- Confirm panel capacity and required circuits.
- Plan receptacles so extension cords are not part of the permanent setup.
- Layer ambient, task, and accent lighting.
- Provide separate controls for different room zones.
- Coordinate smoke and carbon-monoxide alarms as required.
- Plan internet, Wi-Fi, Ethernet, speakers, security, and charging.
- Have the Licensed Electrical Contractor file the ESA notification.
- Obtain the final Certificate of Acceptance.
Plan Heating, Cooling, Ventilation, and Air Quality
- Calculate how the finished rooms will be heated and cooled.
- Coordinate supply and return-air paths.
- Keep combustion equipment and required clearances safe.
- Route bathroom, laundry, and kitchen exhaust correctly.
- Insulate and seal ducts where needed for comfort and condensation control.
- Provide make-up or transfer air where doors isolate rooms.
- Consider a long-term radon test for regularly occupied basement space.
- Confirm that new walls and ceilings do not block service access.
Health Canada recommends long-term radon testing in the lowest regularly occupied level. Its home radon-testing guidance explains the process.
Choose the Insulation and Wall Assembly
- Design the assembly for the foundation type, moisture conditions, and climate.
- Keep moisture-sensitive materials away from damp concrete.
- Coordinate air, thermal, and vapour-control layers.
- Insulate rim joists and other common leakage areas appropriately.
- Include fire blocking and fire separation where required.
- Specify moisture-resistant products only where they belong.
- Keep insulation and vapour-control work visible until inspection.
There is no universal basement wall detail that fits every house. A correct assembly manages inward drying, condensation, bulk water, and local code requirements together.
Plan Sound Control
- Identify airborne noise, impact noise, plumbing noise, and mechanical vibration separately.
- Add cavity absorption where appropriate.
- Consider resilient channels or isolation clips where decoupling is needed.
- Add mass with the specified ceiling or wall layers.
- Seal perimeter gaps and penetrations with compatible acoustic sealant.
- Treat ducts, doors, stairs, and other flanking paths.
- Avoid recessed fixtures that compromise the assembly.
The basement ceiling soundproofing guide explains these methods in more detail.
Select Basement-Suitable Finishes
- Choose flooring around moisture risk, comfort, acoustics, and repairability.
- Test and prepare the slab before resilient flooring or coatings.
- Use tile assemblies designed for the substrate and movement conditions.
- Select drywall or backer boards by fire, moisture, acoustic, and wet-area requirements.
- Use washable, appropriate coatings after moisture is controlled.
- Order enough attic stock for future repairs.
- Confirm delivery access before choosing oversized panels or slabs.
Create the Construction Sequence
- Protect occupied areas and establish dust-control routes.
- Complete selective demolition and investigation.
- Resolve structure, water entry, and underground work.
- Complete framing and service rough-ins.
- Request required rough inspections.
- Install insulation and fire-separation components.
- Request inspection before concealment.
- Install drywall, ceilings, flooring, millwork, fixtures, and finishes in coordinated order.
- Test systems and complete deficiencies.
- Schedule final inspections and close permits.
Complete the Final Walkthrough
- Test every light, receptacle, drain, faucet, fan, thermostat, alarm, door, and window.
- Confirm floor transitions, trim, caulking, paint, and hardware.
- Review access panels and service locations.
- Create and close a written deficiency list.
- Receive permit closure, inspection records, ESA documentation, warranties, manuals, and product information.
- Receive paint colours, tile references, flooring details, and spare materials.
- Photograph concealed-service records and final conditions.
- Review maintenance for pumps, drains, fans, filters, and waterproofing systems.
Conclusion
A basement renovation checklist is most useful when it acts as a set of decision gates. Do not move from design to demolition until use, moisture, structure, permits, budget, and systems are understood. Do not conceal rough work before inspection. Do not treat final cleaning as closeout until permits, records, warranties, and deficiencies are complete. GMC Construction can coordinate those steps through its basement renovation services across Toronto and the GTA.